
Preparing Windows for Development
Scaffold your Windows box with a slick Powershell-driven terminal and set up a streamlined workflow with Git, PNPM, and Node.js
I've written about setting up your development environment on Windows with the use of WSL which is of course more of an emulation trick to bend Windows to your Linux habits rather than a veritable native setup. However, whether you're a purist or have encountered issues with WSL in the past, there may be instances where you want to avoid virtualizing a dev setup on Windows. Without further ado, let's jump in.
The Font
I think we can safely assume that having a legible font that is conducive to the nature of the work at hand is going to increase productivity. Something like a font is naturally highly sensitive to individual preference, so I'll use my choice only for demonstration purposes.
For a development and commandline setup we'll be looking at "powerline" fonts which all sport an expanded glyph set that support popular programming constructs. The powerline version of Hack is my preferred font, but you can browse the available selection and pick one that tickles your fancy.
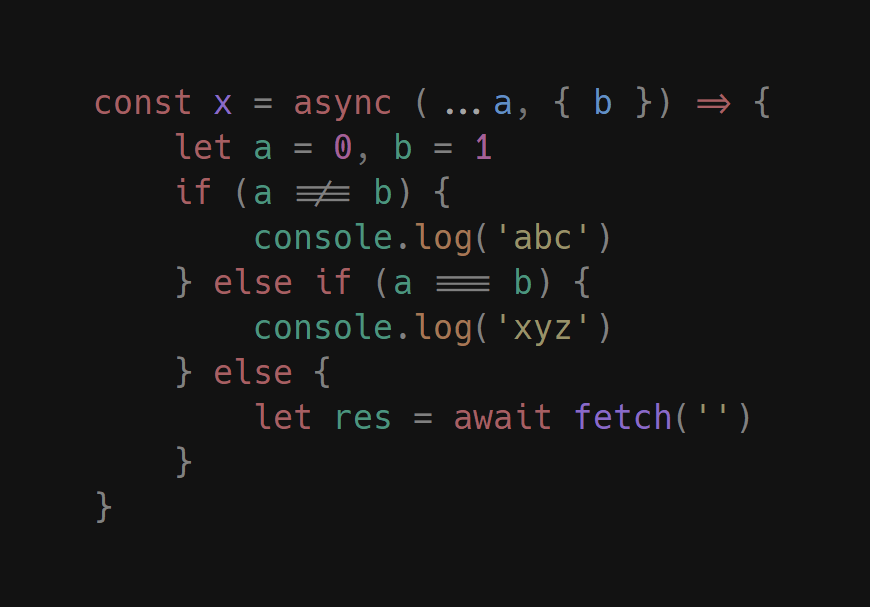
The stock version of Hack lacks some desired ligatures like the lambda, equality, and destructuring symbols, so we'll need a copy of Hack that is patched accordingly. @vikky49 has been kind enough to provide just such a patch, and you can get the installable version from @pyrho.
To make Hack available to Windows, simply download the font and open the desired variants (regular, bold, italic, etc) with Windows Font Viewer. Then, in the top left hand corner, hit the "Install" button.
Upgrade shell
While the Command Prompt on Windows may be suitable for a subset of operations, PowerShell (introduced by Microsoft in 2006) offer so much more in terms of usability and functionality. It even supports a handful of Bash commands (ls, mkdir, wget, curl, cd, pwd etc) by way of aliases to its internal vocabulary, making those coming from *nix backgrounds feel more at home.
Windows 11 ships with PowerShell 5.x pre-installed, but if you want the latest version of this .Net-based shell you'll have to perform a manual install.
Head over to Microsoft's website and select an installation method for PowerShell. I typically just grab the MSI package appropriate for the machine's architecture. As of this writing the latest stable version of PowerShell is v7.3.0.
Emulate terminal
Windows ships with Windows Terminal which is a great shell emulator that's easy to customize and allows you to open a host of different shells within a single window. However, you may be in a position where you often switch between different OSs and would like UI-consistency across your shells, so we'll look into Hyper for the purpose of achieving that aim.
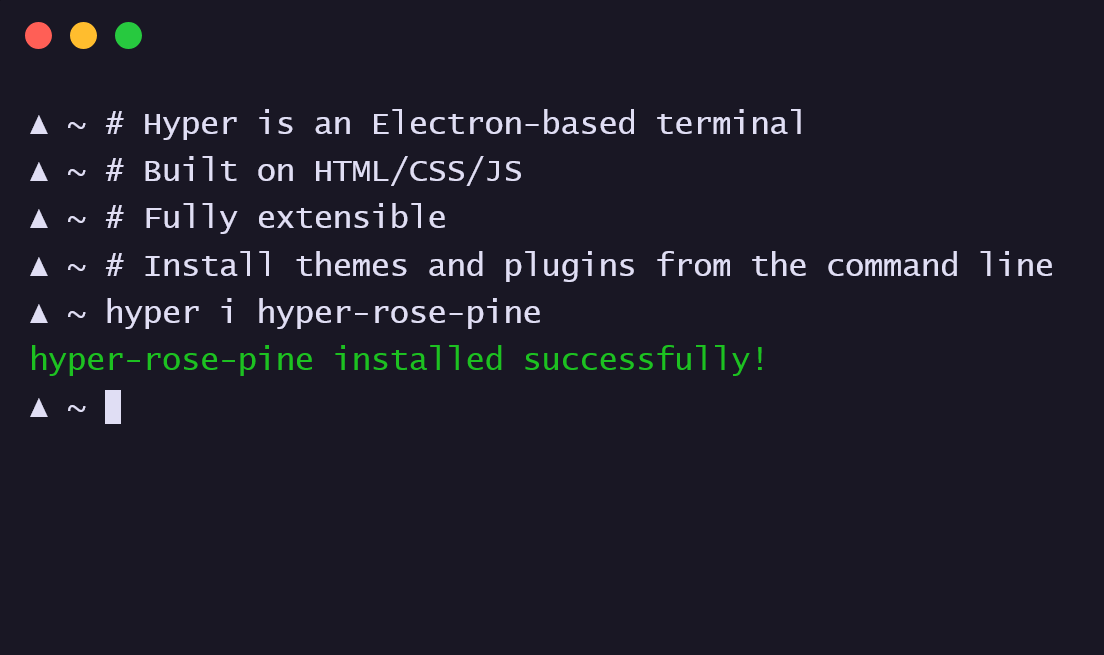
Hyper is an Electron-based terminal emulator that is built with web technologies and therefore conveniently works across environments. We'll use Hyper as a first step to improve the default PowerShell experience.
Go ahead, and grab Hyper from their website. It should detect that you're on Windows and highlight the appropriate executable. I've denoted the configuration changes I've made to my installation in .hyper.js. Hyper's configuration file can be found in your home directory at C:\Users\$USER\AppData\Roaming\Hyper.
module.exports = {
    config: {
        // up the font size a few notches
        fontSize: 17,
        // set your chosen powerline font
        fontFamily: 'Hack Nerd Font Mono, ..., monospace',
        // tweak the padding a little
        padding: '12px 14px 12px 22px',
        // target PowerShell 7.x to emulate on Windows
        shell: 'C:\\Program Files\\PowerShell\\7\\pwsh.exe',
        // specify the plugins it should install from npm
        plugins: ['hyper-one-dark', 'hyperpower'],
        //...
    }
};
Prompt Productivity
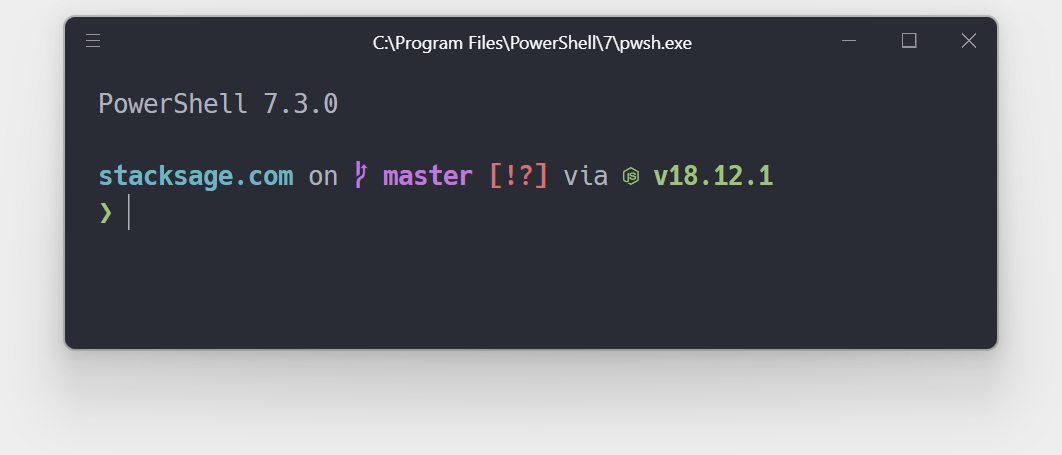
Why don't we spruce up our new terminal with a prompt that conveys helpful context about the state of our shell's current location. Starship is a cross-platform prompt that can display various kinds of meta about the state of a repository, making it easy to tell whether the project has uncommitted changes and what kind of project you're looking at, i.e. Node, Python, Rust, etc.
Starship's documentation covers how to install and activate the prompt in PowerShell. You can use a package manager for installation or simply grab the MSI executable from their releases section on GitHub. Once installed, it's time to actually activate it in the shell of your choosing. Fire up PowerShell to look up the location of its custom profile settings by running PROFILE.
# Look up PowerShell's profile location
❯ $PROFILE
# returns a path:
C:\Users\$USER\Documents\PowerShell\Microsoft.PowerShell_profile.ps1
It's likely the case that the profile directive does not yet exist, so you'll have to create the folder and file accordingly. Open the settings file and add the following line to its configuration:
Invoke-Expression (&starship init powershell)
Restart PowerShell and take your fancy new terminal for a spin.
Getting Git
We'll use Git as our DVCS. Git's latest version can be found on its website. It should detect that you're on Windows and suggest the appropriate download. Once downloaded, open the app and run through the installation steps, taking care to select the options that's right for your particular Git workflow.
Installer steps
The Git installer dialog will prompt you to choose between various options during the installation.
SSH
You'll be prompted to choose an SSH client. Microsoft implemented their own version against the OpenSSH spec for Windows back in 2018, so you can select the Use external OpenSSH option if you're running a recent-enough version of the OS. This way Git will be able to find the default SSH client that's registered on PATH.
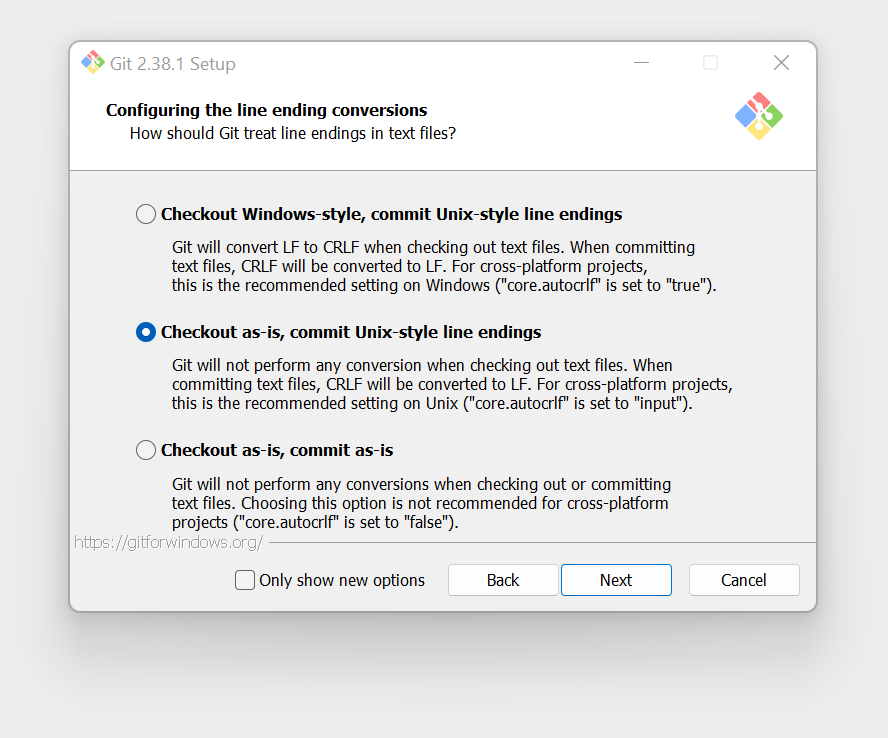
Line endings
Choosing a line-ending strategy for cross-platform projects is important, especially if your code editor does not support *nix style LF on Windows—in this case be sure to choose the first option in which core.autocrlf will be set to true.
If your code editor supports LF on Windows, I've found that the second option works well as pictured in the figure above. core.autocrlf set to input ensures that no linefeed conversions are performed and thus there won't be a slew of "modified" files popping up on the radar by virtue of their changed line-endings, while still normalizing all commits to LF.
Let's finally run a couple of commands to ensure the Git installation went according to plan, and to set up some default contribution meta.
# check installation
❯ git --version

# configure your default repo meta
❯ git config --global user.name "Your Name"
❯ git config --global user.email "user@users.noreply.github.com"
Autocompletion
Autocompletion is not available for Command Prompt on Windows, but since we're using Powershell we can enable it through the help of Keith Dahlby's posh-git script.
There's a couple of steps involved in getting posh-git to work. Run the following lines to first get it installed:
# only packages downloaded from the web needs to be signed
❯ Set-ExecutionPolicy -Scope CurrentUser -ExecutionPolicy RemoteSigned -Force
# use PowerShell Gallery to install posh-git
❯ Install-Module posh-git -Scope CurrentUser -Force
# import git-posh into the current session
❯ Import-Module posh-git
# load git-posh in all future sessions by adding it to $profile
❯ Add-PoshGitToProfile -AllHosts
You can also skip the last step above and manually add Import-Module posh-git to the PowerShell profile we created earlier to invoke Starship (Microsoft.PowerShell_profile.ps1), or create a new profile.ps1 in the same folder and add it there.
That's a wrap; time to take that fancy new autocompletion for a spin.
Setting up SSH
SSH is an implementation of key-based authentication which increases security against brute-force attacks when working across domains by using asymmetric cryptography to generate a set of key files. The set consists of two files, one for the client device (private key), and one for the server (public key).
If you're running a version of Windows no older than 10 it should be relatively straightforward to get an SSH client installed if if it's not already have it activated. Verify presence or install it by going to Windows Settings > Apps > Optional features, and then search for "OpenSSH".
Let's begin by setting up a new keypair.
# check for existing keys
❯ ls ~/.ssh/

# otherwise, generate new private/public pair
❯ ssh-keygen `
  -o ` # save private-key using new OpenSSH format
  -a 256 ` # higher KDF ups brute-force resistance
  -t ed25519 ` # use more secure Ed25519 algorithm
  -C "$(hostname) $(Get-Date -format 'yyyy-MM-dd HH:mm:ss')" `
  -f C:\Users\$USER/.ssh/id_github `
  -N passphrase # 2FA
The last flag we pass (-N) sets up 2FA on our private key for an additional layer of security. You should now have a set of keys, one private (sans extension) and one public (ending in .pub).
Next, use the utilities ssh-agent and ssh-add to securely manage your keys within a Windows security context that's tied to your user account. Set a startup service to run ssh-agent on reboots, and then add your newly generated private key to the ssh-agent (fig. 5.2).
Once it has been added it's a good precaution to remove it from your local machine and back it up on air-gapped memory. Going forward ssh-agent will automatically retrieve the key and pass it to your SSH client.
# using an elevated PowerShell prompt, run
❯ Get-Service ssh-agent | Set-Service -StartupType Automatic
# fire up the agent
❯ Start-Service ssh-agent
# status should be 𝘙𝘶𝘯𝘯𝘪𝘯𝘨
❯ Get-Service ssh-agent
# load your keyfile
❯ ssh-add $env:USERPROFILE\.ssh\id_github
You should now be all set with a seamless SSH workflow—as long as you are signed in to your user account you won't have to enter your private key password each time you connect to a remote host.
Managing multiple identities
It might not make sense for everyone to set up separate SSH configurations. While you can apply it to a single identity, it may be more worth the effort if you plan on using several keypairs. Depending on your requirements you can skip the config setup shown in the next code snippet (fig. 5.3).
An SSH configuration allows for granular management of distinct client-server keypairs with a centralized place from which to control settings.
We might set up keypair settings for our hypothetical identity in %USERPROFILE%\.ssh\config as illustrated in snippet 5.3. All additional keypair configurations are added to the same config file, each denoted by a different Host header.
# global flags
AddKeysToAgent yes
PasswordAuthentication yes

# GitHub | Windows Box
Host github.com
    HostName github.com
    User git
    IdentityFile C:\Users\{user}\.ssh\id_github
    IdentitiesOnly yes
PNPM & Node.js
As of this writing PNPM is a relatively new JavaScript package and monorepo manager that packs a number of benefits over the likes of NPM and Yarn. Not only is it faster and more efficient, but it also allow you to reduce your dependency footprint for managing Node.js versions between projects—a utility such as nvm is no longer required as PNPM packs a similar feature.
# install PNPM
❯ iwr https://get.pnpm.io/install.ps1 -useb | iex

# verify installation; should return name, version
❯ Get-Command pnpm
PNPM will automatically install the Node.js version specified in a project's .npmrc file upon initial run. However, to arbitrarily install or switch between versions of Node.js refer to snippet 6.2. An exhaustive list of options may be found in PNPM's documentation.
# install & use LTS version
❯ pnpm env use --global lts

# install & use Node.js v18
❯ pnpm env use --global 18

# list locally installed versions
❯ pnpm env list

# list remotely available versions of v18
❯ pnpm env list --remote 18

# uninstall a particular version
❯ pnpm env remove --global 16.0.0
PowerShell helpers
You may want to add a couple of shortcuts to your shell to make it easier to navigate to projects. Shell scripts and aliases can be set up in your PowerShell profile—it's usually located in C:\Users\{user}\Documents\PowerShell.
If you don't have a profile you can run the following command to create one:
New-Item -path $profile -type file -force
# define routine
function GoToProjectX {
    cd "$env:USERPROFILE\projects\Project X\"
}

# tie routine to new alias
New-Alias projectX GoToProjectX
Save your profile and restart the shell. You should now get autocompletion for your aliases and running projectX should take you to its location. Your PowerShell profile will of course accept all kinds of automation and administration logic, but we're going to restrict it to alias methods for this post. Repeat the steps in snippet 7.1 for all the paths you want aliases for.
Wrap-up
I think Microsoft came a long way in recent years by way of making Windows more palatable to a wider gamut of developers. Can't say it has necessarily reached the point where I'd prefer it over a Mac or Linux box for web development per se, but I believe it is now a worthy contender—if only for experiemental purposes—and definitely worth a spin.